By Harriet Sylvester
One of the projects I have been working on within the Ceramics Department at West Dean College during my Graduate Diploma year is a large Chinese export porcelain blue and white 'soldier' vase and lid from the Kangxi reign (1662-1722) from the factories possibly at Jingdezhen in China (Figures 1-3). This blog post will cover the start of the journey of treatment, including removal and dismantling of previous restoration material to the lid, cleaning, bonding and filling areas to replace lost material. Keep an eye out for the next instalment!
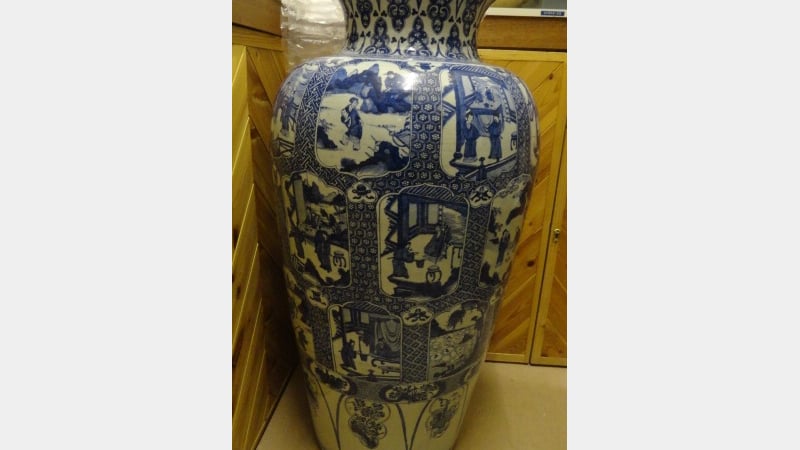
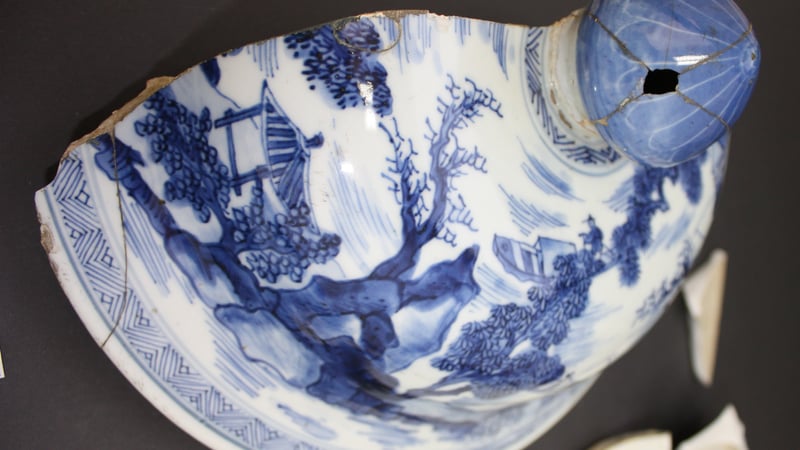
The large vase and lid are made from hard-paste porcelain with painted decoration in a vivid cobalt underglaze blue. The blue and white decoration is formed as underglaze, which is when the pattern is painted directly onto the surface before glazing. The height of the baluster vase would have meant that the vase was made in sections on the wheel and then formed as one. The thickness of the porcelain at the shoulders identifies where sections were possibly joined and the ripple effect inside the body of the vase displays the turning of the wheel showing manufacturing techniques formed by the potter.
Visual Examination:
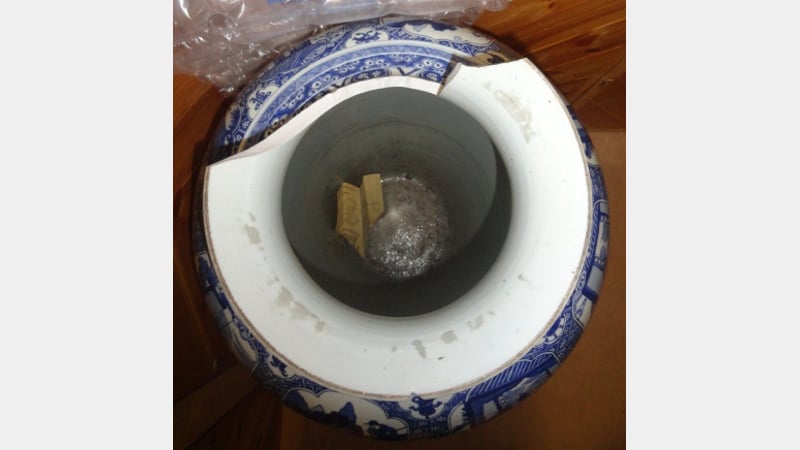
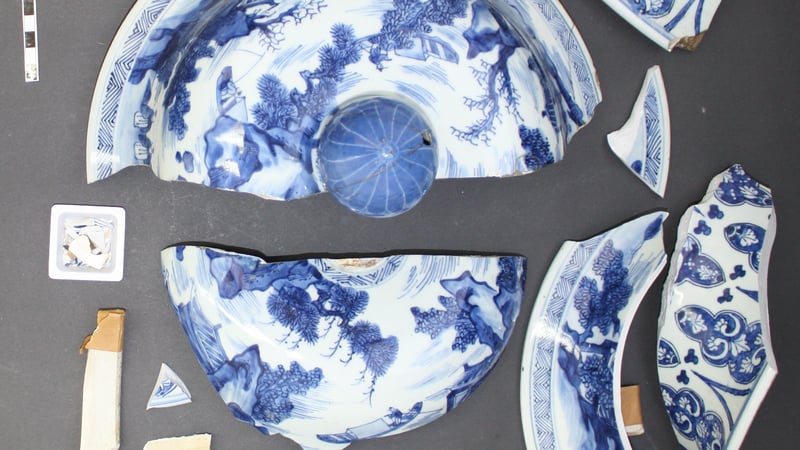
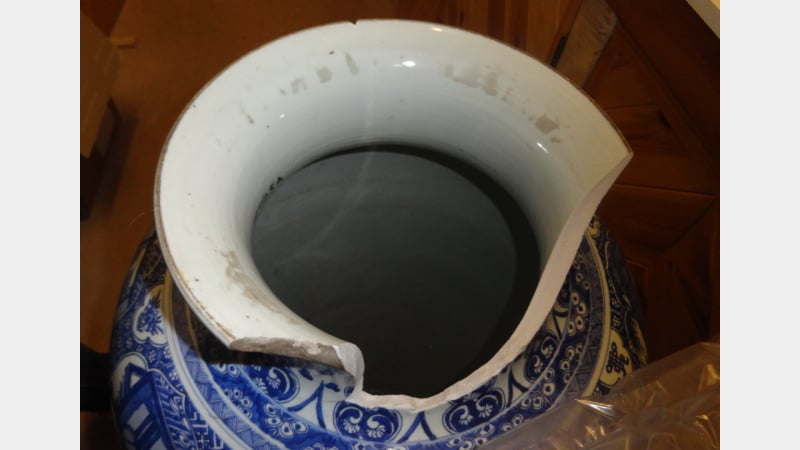
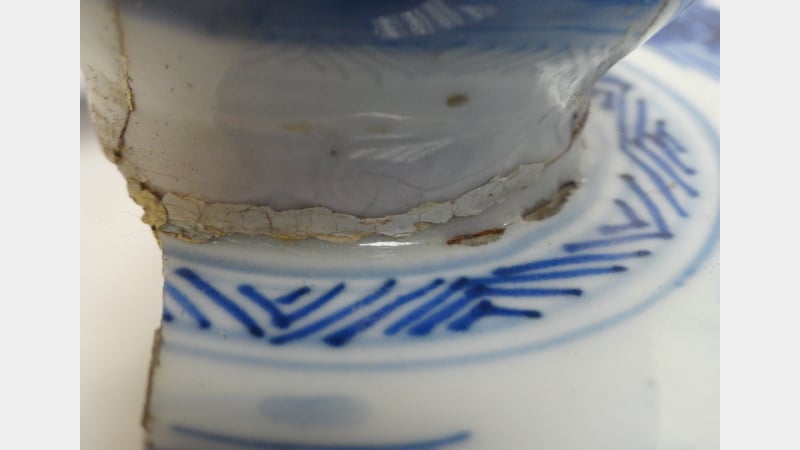
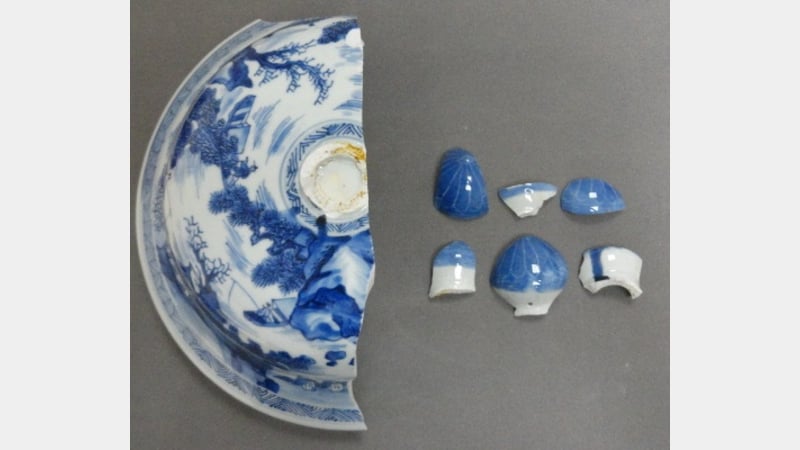
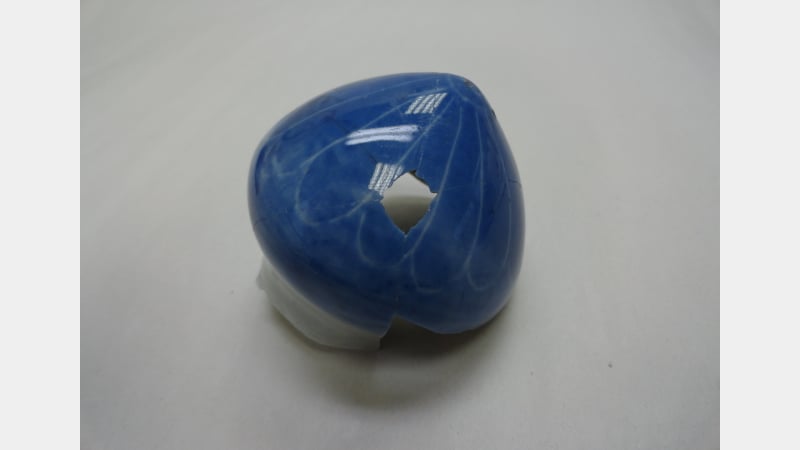
On the lid and shards there was evidence of previous restoration adhesive, fill material and areas of loss (Figure 4). This monumental vase is structurally stable, however part of the waisted neck of the vase had been damaged (Figure 5), with three shards making up part of the area of loss.
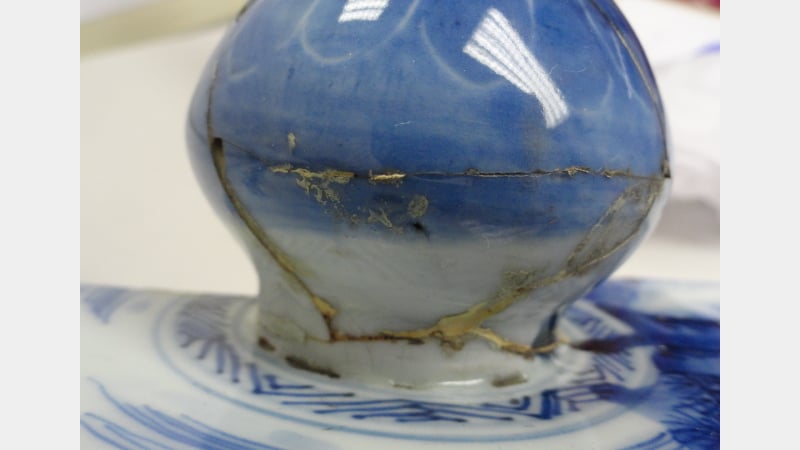
One half of the domed lid was intact with noticeable past repairs to the knop. The thin and fragile porcelain of the knop has visible bonded breaks on the curved section and also where it joined to the lid; there was also evidence of an area of loss. Together with a weighing boat of fragments of glaze and ceramic body, six other shards made up the other half of the lid. Along the break edges of the shards there was evidence of old adhesive, fill material and parcel tape which has been applied carelessly, covering the original porcelain beneath.
Dismantling of Previous Restoration Material:
Dismantling of past restoration was essentially needed on the lid and knop. When observing the knop, it was evident there was areas of over-paint on the joins to disguise the break line (Figure 6). Cotton wool swabs of acetone firstly removed areas of over-paint and excess adhesive (Figure 7).
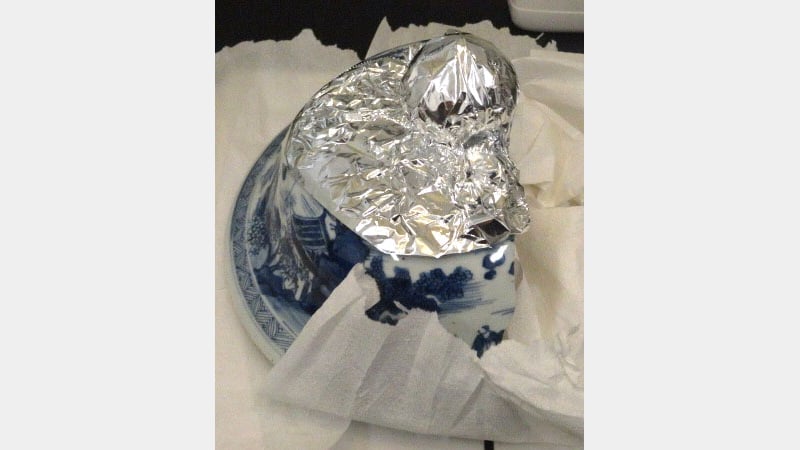
Within the fume cupboard, under extraction, cotton wool was laid along all the break edges for cleaning and dismantling, where past restoration adhesive existed; this was saturated in acetone to help soften the adhesive. To prevent vapours of acetone evaporating from the cotton wool, the areas were wrapped in tin foil (Figure 8).
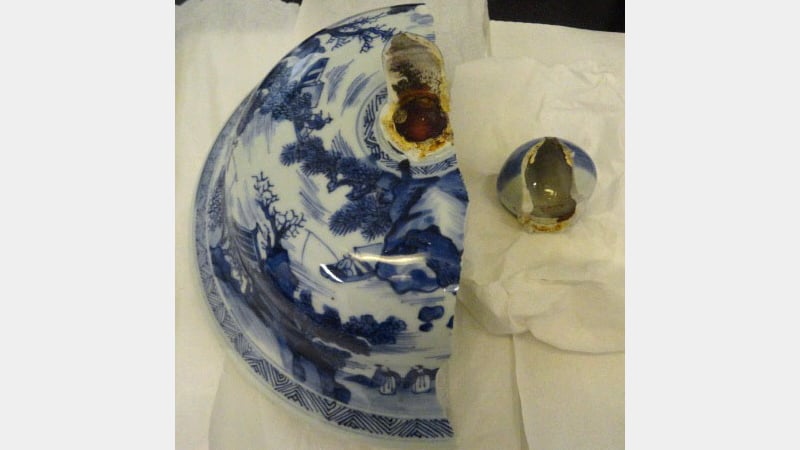
Each shard was surface cleaned with deionised water to remove solvent residues, which added to the softening and removal of the restoration material. All the shards were thoroughly cleaned to remove past adhesive and rinsed with a steam cleaner to eliminate any remaining residues. The introduction of hot water to one shard dismantled and released a stubborn area which would not dismantle with acetone. The dismantling of the knop revealed an excessive amount of adhesive, characteristic of shellac, which had pooled at the bottom of the knop (Figure 9).
Each shard became dismantled from the knop, using acetone and the steam cleaner; this led to a successful dismantling procedure and which helped to soften the majority of the material prior to cleaning (Figure 10).
Cleaning:
Staining from past restoration adhesive and dirt was still existent and noticeable on the break edges. To reduce the discolouration and organic staining, a Bio-tex® and Calgon® solution was prepared; 300ml of warm water in a beaker (heated to body temperature, as boiling water would kill the enzymes within the biological washing powder), 4 teaspoons of Bio-tex® and 1 teaspoon of Calgon®, a water softener. Thin strips of kitchen roll were dipped into the solution to absorb the liquid and placed along the break edges. Each break edge was steam cleaned to remove residues and eliminate any loose dirt or staining on the surface; they appeared significantly cleaner.
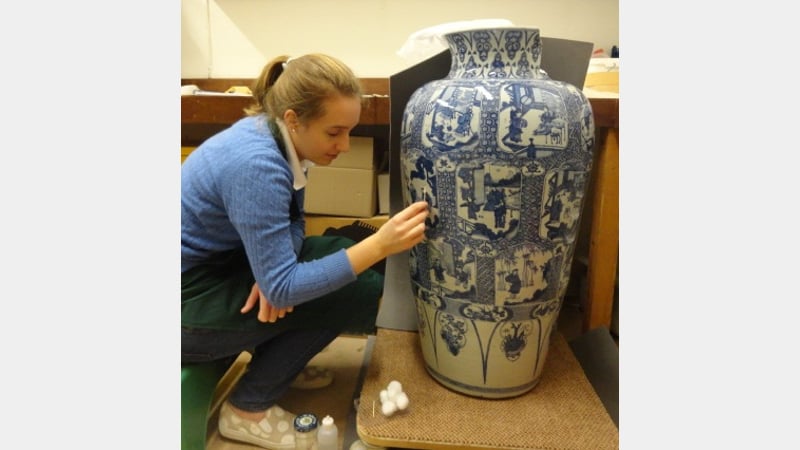
Surface cleaning began on the vase to soften the staining on the decorative surface; deionised water was used over the entirety of the vase (Figure 11). Noticeable grease and grime was being removed, visible by the discoloured cotton wool swabs.
Bonding:
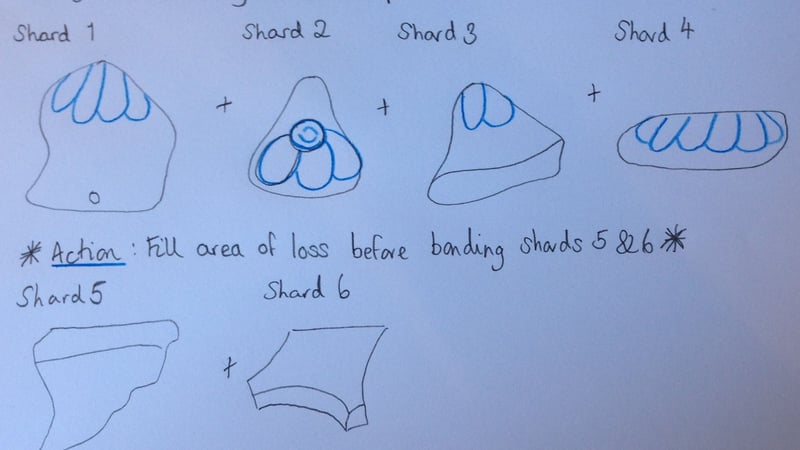
The knop shards had been thoroughly cleaned and dried. A dry run of the assembly had been previously carried out to observe the positioning of the shards to prevent them locking out of alignment during bonding. The shards were supported temporarily with strips of Magic™ Tape which securely supported them in position. The diagram in Figure 12 displays the assembly order of the shards.
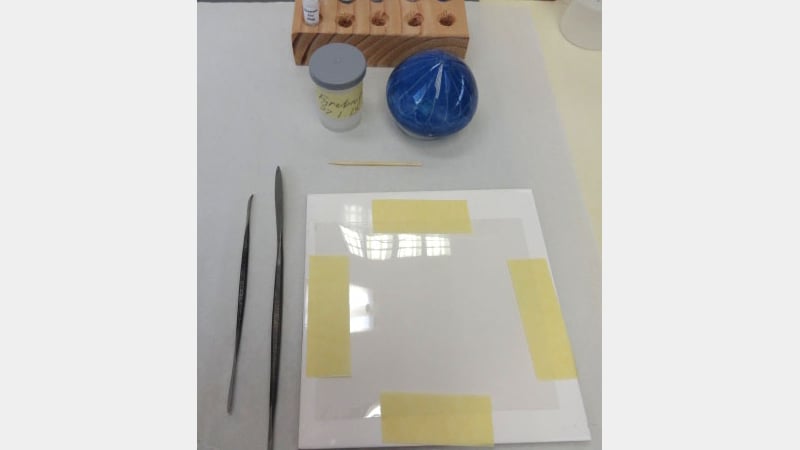
1g of Fynebond® epoxy resin (Part A) was mixed to 0.32g of the hardener (Part B). Once thoroughly mixed with a cocktail stick, a drop of Fynebond® was placed on Melinex® film to observe the adhesive during the curing times and to signify to the conservator the adhesive has cured. Using a cocktail stick, the conservator dotted small amounts of adhesive along the break lines in between the strips of supporting Magic™ Tape. It was left to cure, raised on cocktail sticks to prevent attachment to the surface beneath (Figure 13).
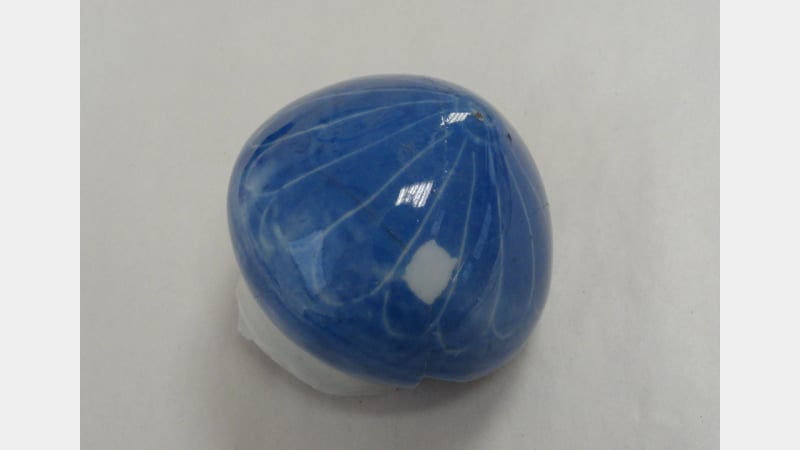
Prior to bonding the lid, the break edges were degreased with cotton wool swabs of acetone. Following the assembly plan, Magic™ Tape was used to support the shards into position. Once happy with the tight alignment of all the shards, the epoxy resin adhesive was mixed. Fynebond® was the chosen adhesive for bonding the lid and it was tinted with titanium oxide dry powdered pigment. The adhesive was dotted along all the break lines to allow for capillary action to take place. The adhesive had successfully cured after 48hours, the tapes were removed and further excess adhesive was softened with acetone and pared back with a scalpel (Figure 14).

Filling and Colour Matching to Replace Lost Material:
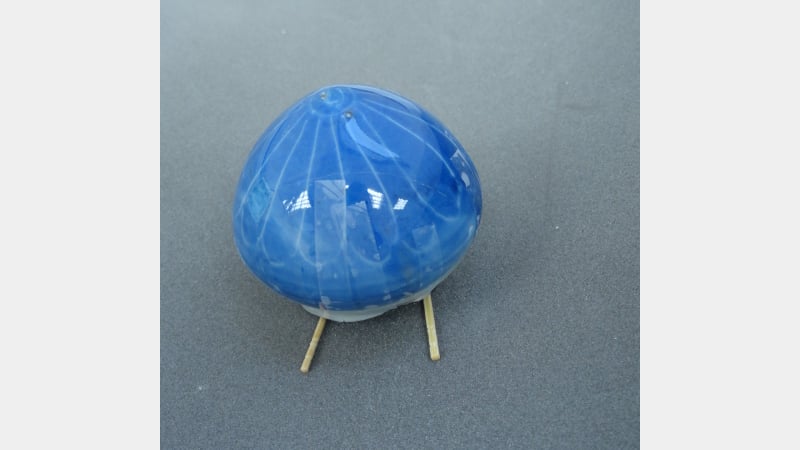
The areas of loss to the knop and lid were core filled using Fynebond® epoxy resin bulked with Cab-O-Sil® (fumed silica) and colour matched to the ceramic body with dry powder pigments (Figure 15). Varying amounts of cobalt blue, yellow ochre, alizarin crimson, zinc white and indigo pigmented the bulked adhesive. The core fill material was applied with a spatula into the areas; a depth was left for the application of the glaze layer. Once cured the area around the fill was cleaned using cotton wool swabs of acetone.
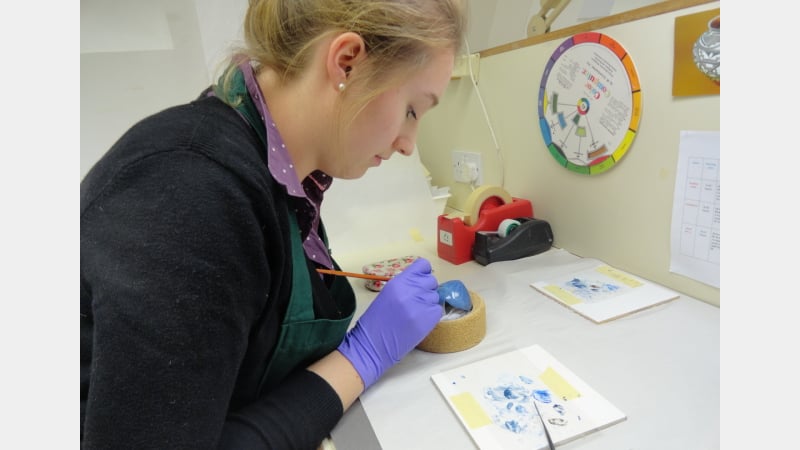
To colour match the core fills on the knop, liquid Fynebond® with small amounts of Cab-O-Sil® was pigmented to match the glaze colour of the ceramic (Figure 16). Cerulean blue, indigo, cobalt blue deep, zinc white and burnt umber pigments were mixed to the Fynebond® using a spatula. A fine paint brush dabbed in acetone applied the pigmented Fynebond® which was smoothly brushed onto the surface; varying shades of blue achieved the diluted painted wash appearance (Figure 17). Larger amounts of Cab-O-Sil® were added to the pigmented Fynebond® to make a paste to colour match the areas on the lid. It was left to cure underneath a sheet of acid-free tissue to prevent dust settling on the area.
Watch this space to read Part II of the treatment carried out on the Kangxi vase and lid. Thank you for reading!